Time for a Website Upgrade
Adding theming and improving performance
17 June 2021
4 min read
With the release of Nextjs 11, I decided it was time for some website improvements. Some of the key problems I wanted to solve was:
- Initial image loading
- Better development linting
- Dark mode (very exciting)
Nextjs to the Rescue
Thankfully, these first two are made easy by Nextjs 11. The recent placeholder property
added to the next/image component allows for the easy generating of blur effects on the
initial load of images. Check out more about the feature in their blog post.
Nextjs also added ESLint support with great defaults and performance-related linting.
It's easy to get started by running npx next lint which configures ESLint and lets you know
what you need to fix. This is included as a part of Conformance for Nextjs
which looks like a great direction for the future of the framework.
Theming!
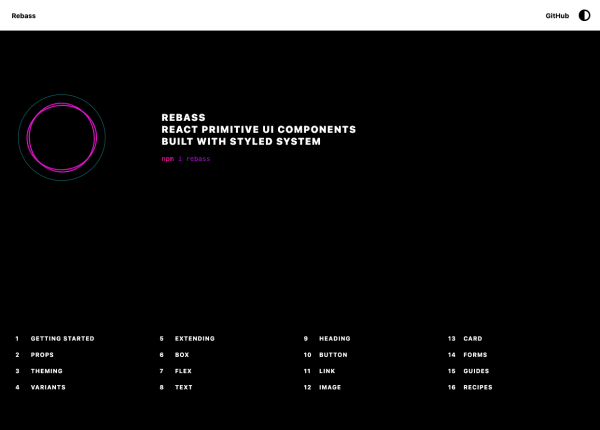
I originally wanted to just achieve a dark mode option for my website, but I decided I wanted to make more colour schemes avalible whilst still having an automatic colour switcher. My inspiration originally came from the Rebass website pictured below which has a similar colour scheme switcher.

The styling of my website is done with TailwindCSS, and since it supports using CSS custom properties, that was where I started my implementation.
I used the strategy of creating a ThemeHandler to consume a theme from local storage, and a piece of global state provided by zustand.
export const useTheme = create<ThemeStore>((set, get) => ({
  theme:
    getLocalStorage("theme") ||
    (typeof window !== "undefined"
      ? window.matchMedia("(prefers-color-scheme: dark)").matches
        ? "dark"
        : "light"
      : "light"),
  updateTheme: (theme) => {
    setLocalStorage("theme", theme);
    set({ theme });
  },
  rotateTheme: () =>
    set((s) => {
      const keys = Object.keys(themes);
      const i = keys.indexOf(s.theme);
      const newTheme = (keys.length - 1 > i ? keys[i + 1] : keys[0]) as keyof typeof themes;
      setLocalStorage("theme", newTheme);
      return { theme: newTheme };
    }),
}));
Because this is outside of a component and Nextjs code is run on the server, I do need to make sure that
the window exists before checking if dark mode is active using window.matchMedia('(prefers-color-scheme: dark)').matches. Next, I
needed to attach some CSS variables to the root of the document for the initial load of the website,
and a set of themes to consume later.
:root {
  --brand: #d43c29;
  --on-brand: #ffffff;

  --accent: #6f5623;
  --accent-hover: #846929;
  --accent-focus: #9a7c2e;
  --on-accent: #ffffff;

  --background: #ffffff;
  --on-background: #4d5c63;
  --heading-on-background: #000;

  /* ... */
}
export const themes = {
light: {
brand: "#d43c29",
/* ... */
},
dark: {
brand: "#e36552",
/* ... */
},
};Now we get to the fun stuff - actually changing the colour scheme. This is done in a useEffect hook
so we can only change the theme only when we need to. By attaching an event listener for change
to window.matchMedia('(prefers-color-scheme: dark)') we can update the theme automatically if the user
turns on their computers dark mode.
We can then use our theme object to get the set of colours we need to apply and utilise /*...*/ style.setProperty(`--${key}`, value)
to update the colour scheme. You can find below some more of the code I used for changing and handling the theme.
const theme = useTheme((s) => s.theme);
const updateTheme = useTheme((s) => s.updateTheme);

/* ... */

useEffect(() => {
  if (!document.documentElement) return;

  window.matchMedia("(prefers-color-scheme: dark)").addEventListener("change", (e) => {
    if (e.matches) {
      updateTheme("dark");
    } else {
      updateTheme("light");
    }
  });

  const currentTheme = themes[theme];

  Object.keys(currentTheme).forEach((key) => {
    const value = currentTheme[key as keyof typeof currentTheme];
    document.documentElement.style.setProperty(`--${key}`, value);
  });
}, [theme, updateTheme]);
The Future
It was a lot of fun doing this performance refresh. Keep your eye out for more themes coming in the future. Some features I may look at adding next along these lines are a theme picker for code blocks and more development tooling to help create more performant images.